Steps for setting up a MIG machine
1. Connect the gas and regulator
Connect the pipes to the end of your regulator and to where it is required on the welding machine. It is different for all types of machines, but easy enough to locate. Screw the regulator to the gas bottle, it will be a right-hand thread because it’s not a flammable gas. If your regulator doesn’t fit don’t try to force it, you probably have the wrong regulator for the gas.
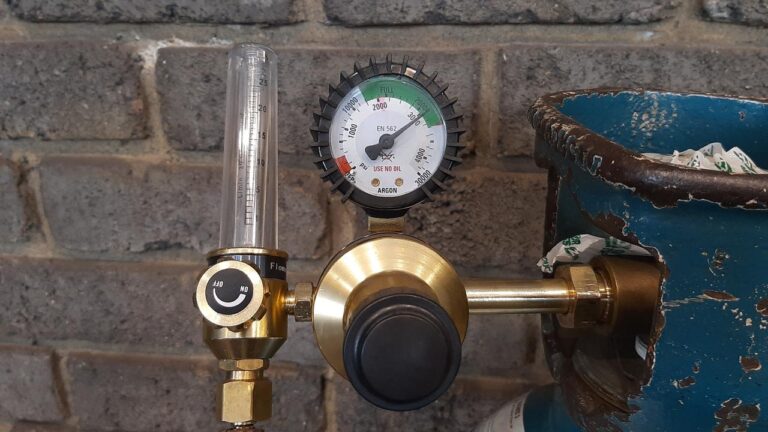
2. Check for any leaks on the regulator
The best and easiest way to check for a leak on a gas regulator
The easiest way to check for a gas leak on a regulator is to simply open the regulator, let it gain pressure, and close it immediately. If the pressure drops you have a leak. The faster the pressure drops the bigger the leak.
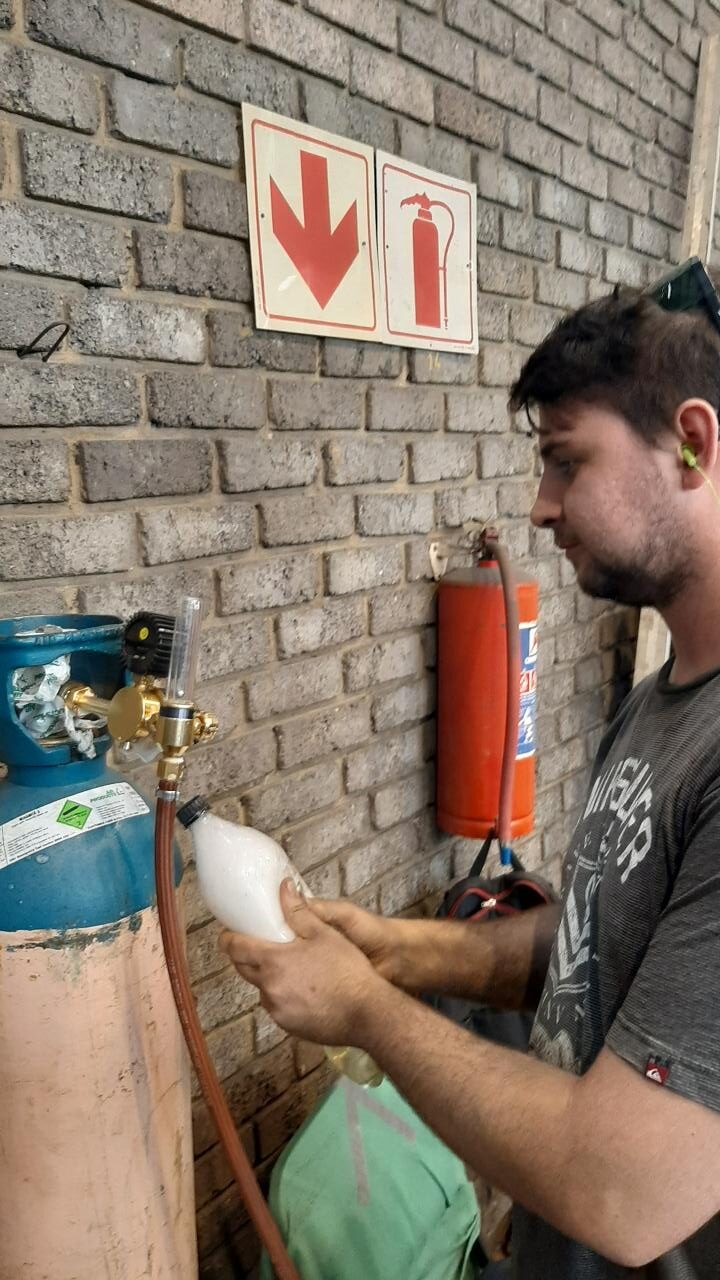
How to check where your regulator is leaking
Add a bit of soap to water in a spray bottler and gently spray it over the regulator, if there’s a leak the soap will start to form bubbles. Make sure to not use any oil-based soaps because it is dangerous to have oil on your regulator, especially flammable gasses. They can explode due to the oil.
If you don’t have a spray bottle you can use an old plastic bottle with a small hole in the cap. Fill it halfway with water and add a bit of soap, then shake it till it makes a foam. Hold the bottle underneath the regulator and spray the foam onto it. Do not spray the soapy water onto the regulator because it will be very hard to see any bubble form.
3. Connect the welding torch
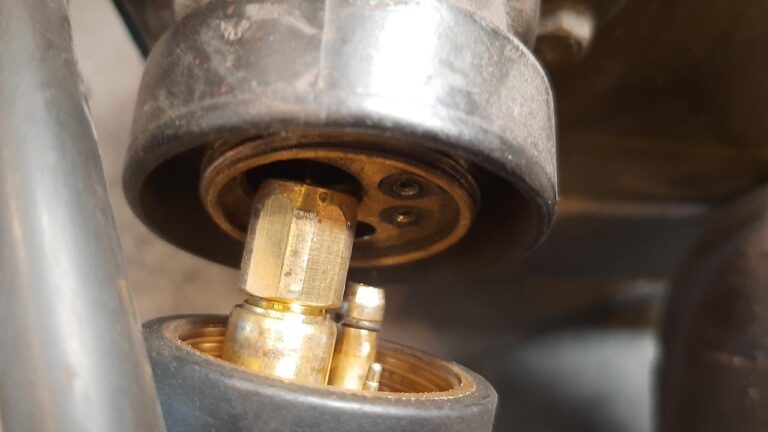
This is very simple connect the welding torch with the corresponding holes on your machine or feeder and tighten the nut. This is universal for all MIG welding machines.
Just be careful to not damage the small pins on the MIG torch.
4. Insert the wire
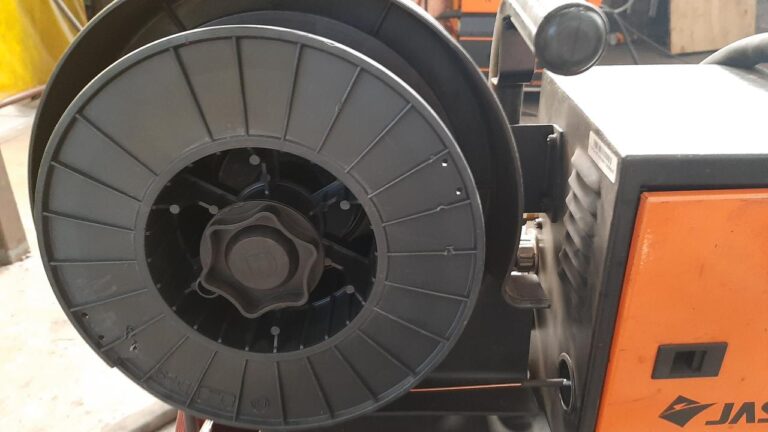
Insert the wire roll with the wire running underneath the roll. Do not let go of the wire while you insert it, because it will spring out and you might have to cut the sprung wire off, wasting a bunch of wire.
Insert the wire into the wire guide. Make sure the guide wheel is inserted and has the correct grove in line with your wire. Make sure you don’t tighten the guide too much because it can cause the wire to snap and build up in the feeder.
5. Run the wire through
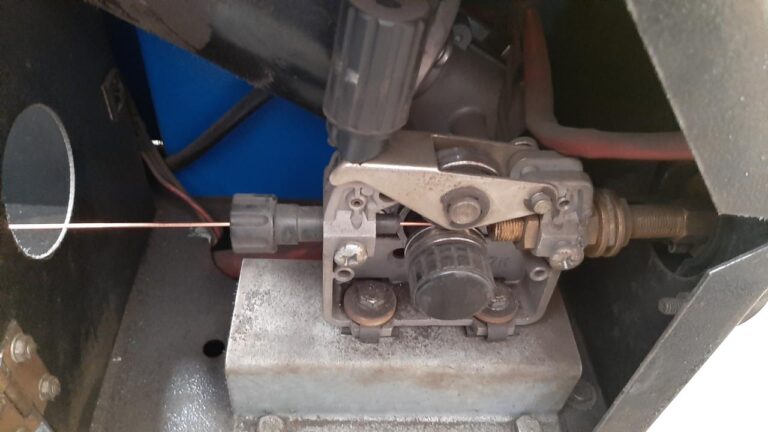
Make sure your torch isn’t knotted or twisted and stand next to your feeder so your welding torch cable is in an u shape. Press the button for the wire to run through, keep an eye on the feeder to check that everything is running smoothly. Remember to keep your gas closed to avoid wasting any gas unnecessarily.
6. Connect the earth clamp and cable
When you are welding MIG you must make sure your earth is connected to the negative polarity.
7. See that there’s an arc
Now that everything is connected just do a quick check to see if your machine is arcing. Also, while you give a quick tack check that there’s no porosity aka enough gas is coming through.
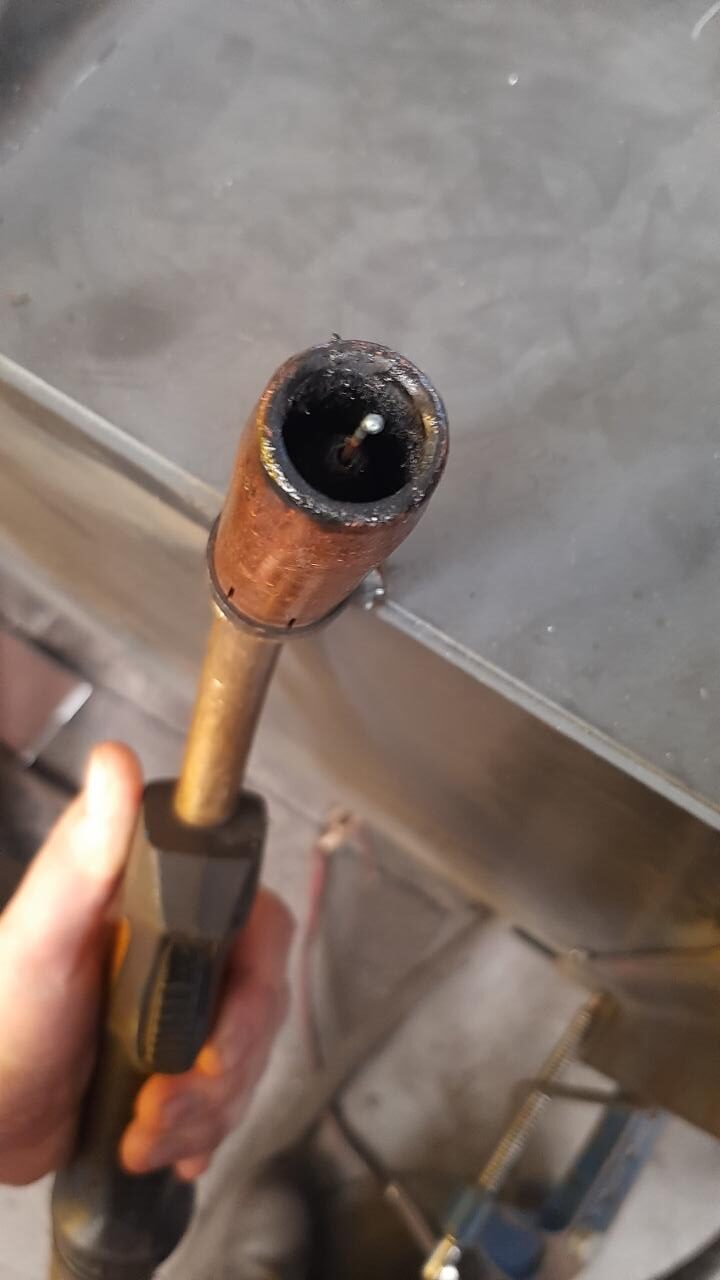
8. See that your shroud/nozzle is on
The shroud/nozzle is a rounded copper frame with a chrome coating. This is used to guide the gas over the molten metal to protect it from oxygen that forms porosity.
9. Remember to use anti-spatter
This is a spray can with a special oil that prevents the weld spatter from sticking to your shroud or the inside of the torch. You absolutely have to use it otherwise you will damage the torch to where you might not be able to use it anymore.
Simply spray the anti-spatter onto your shroud/nozzle and into the front of it.
What is spatter and how to reduce it?
Spatter in welding is small speckles of the welding wire that spatters around when welding. This is a by-product of welding. If you find that you have a lot of spatter you can try and reduce the gas flow or increase the volts and wire speed.
The professional way to use a MIG welding machine

What the gas pressure should be
The faster your wire speed the higher your gas flow should be.
Tip: you can use an argon gas regulator with your generic MIG gas mixture.
The welding torch
Your torch nozzle/shroud shouldn’t be flush with your contact tip. Most machines and people tend to keep it flush, but it can prevent a few problems just by grinding down your contact tip or getting a longer shroud. It helps reduce the heat the contact tip gets while welding. The wire in turn is less likely to arc to the tip or the tip to burn away.
Best way to be sure you are using the correct settings(Wire-speed and volts)
While you are welding you should hear constant crackling sounds. If you are hearing more of a blowing sound your wire speed is too low or volts is too high. If it feels like the wire is pushing the torch away, then your wire speed is too high or your volts too low.
Prepping your workpiece
Prepping your work before welding can make a huge difference in the quality and appearance of your weld.
- You should grind away any rust, scale, and slag.
- There must just be pure steel to weld on.
- Try to have a small bevel for any flat welds
- Avoid welding on jagged materials.
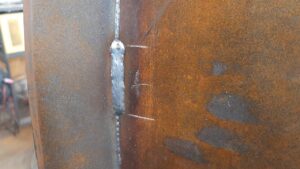
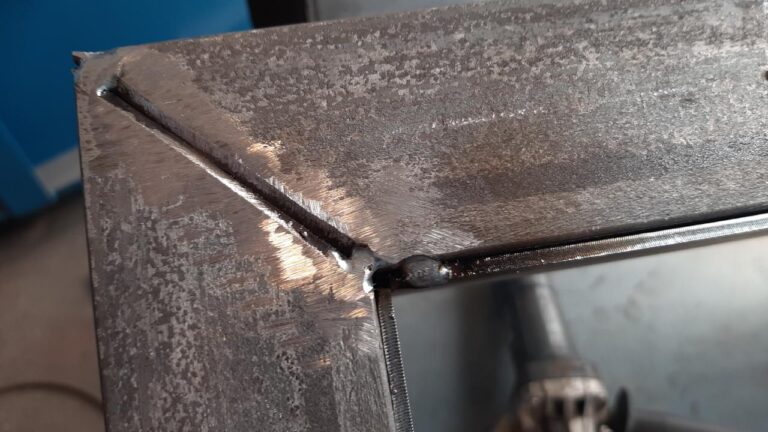
How to know you are welding correctly
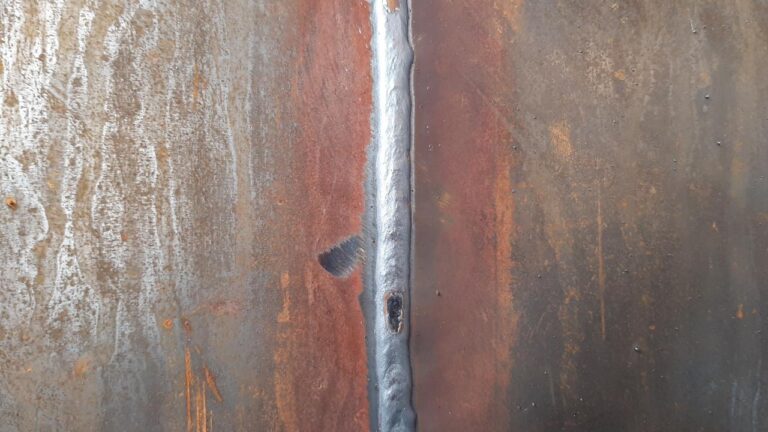
Knowing comes with experience, but here are a few things you can look out for when welding MIG to know for sure you are going to have a proper weld.
Please note: Welds can still be proper while not looking very good. The function of a weld is to join two metals and if it achieves this, then it can be considered proper.
- While you are welding you should make sure the two metals are fusing.
- Move at a constant steady speed
- Don’t linger on a spot. You will burn a hole into the metal.
- Going too fast won’t fuse the metals.
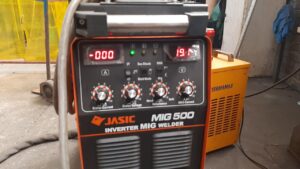
- Keep the volts and wire-speed for the correct metal thickness. The table is usually found on the machine
Making sure the two metals are fusing equally and you keeping the weld at more or less a constant speed you will most likely have the perfect weld good looking and strong. This can be applied to any type of welding.
You can read on the “common problems you can run into while using a MIG welder” to expand your knowledge.
Angle and speed of your torch when welding MIG
A good rule of thumb is to hold your torch at about 60 degrees with the wire sticking out about .5 to 1 inch from the shroud. Make sure the wire is showing in front and you are moving towards where you are welding, not away.
This helps you to clearly see where you are welding and to avoid going off your welding line. Your weld will also look a lot better.
The speed at which you must move while welding MIG depends on the thickness of your weld, the speed of the wire, and the volts of the machine. If the two metals are fusing properly then you know you are moving at the correct speed, but if you see a bulging weld then decrease your speed and if you are burning holes or have excessively fat welds then you are moving too slow.
That being said a speed of about 600mm per min will do the trick in most situations when welding MIG
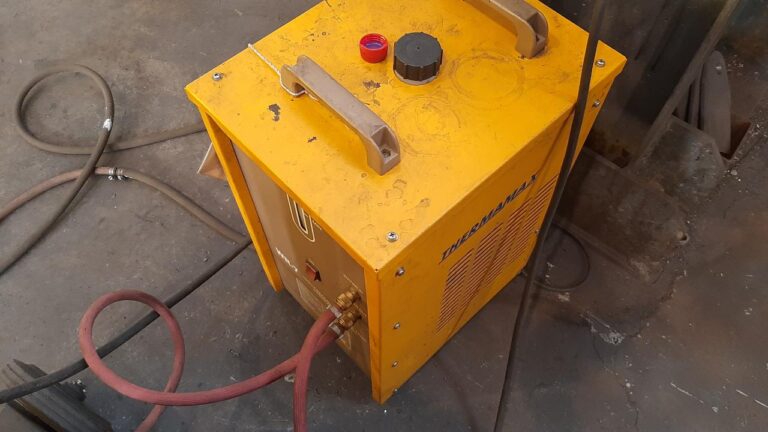
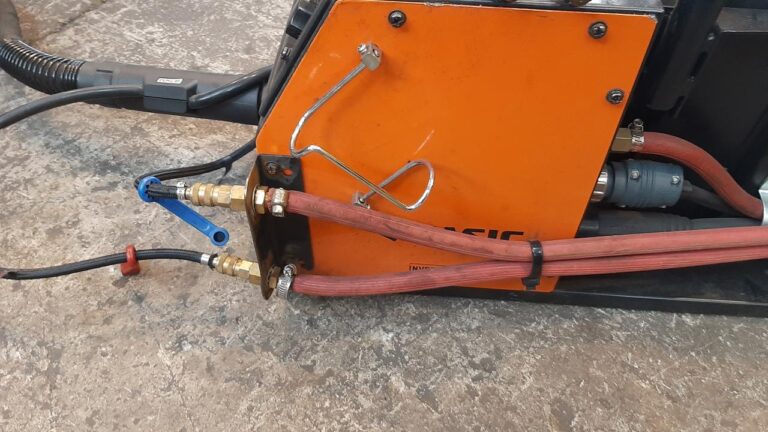
How to connect a water-cooled MIG welding machine
There’s just one extra step you have to follow when connecting the water-cooled MIG machine and that’s connecting the actual water cooler. It is very easy, you just have to connect the correct water hoses to the cooler and your feeder.
They will be clearly marked in and out and the torch will have red and blue markings. Red will be connected to water in and blue to water out. So the hot water will be taken to the cooler, cooled down then circulated again to the torch.
You can still use a water-cooled torch without a cooler. It might just get a bit hot welding when you weld for a while and at high volts.